If you have a bypass humidifier in your home, you must know how important it is to clean it regularly. But do you know how to clean a bypass humidifier?
If not, there is no need to worry. We will show you how to clean a unit in 7 easy steps. After following these steps, you can clean your bypass humidifier by yourself.
How To Clean A Bypass Humidifier? 7 Easy Steps
A bypass humidifier is a whole-house humidifier. It uses your HVAC system to distribute moisture throughout your home.
This can help to improve the air quality in your home. Also, it is good for symptoms of dry air, such as nosebleeds, cracked skin, congestion issues, static electricity, etc.
It is very important to clean them regularly to prevent mold and mildew growth.
If these growths are not removed, they can spread through the humidifier into the air. Later, it can cause many respiratory problems.
Then, too, mold can damage the humidifier, causing it to break down prematurely.
Cleaning your bypass humidifier can also help to improve its performance. Over time, mineral deposits can build up in the humidifier. Which can reduce its efficiency after some time.

To avoid that, here are seven easy steps that will help you how to clean a bypass humidifier.
1. Unplug The Humidifier:
A bypass humidifier is fix in your home’s HVAC system, along with a furnace. It requires water from your home’s water supply line. So, different pipes connect it with the system.
Before cleaning the humidifier, you need to unplug it from the power source and the whole system. Then, remove the water tank from the unit. While doing so, be careful not to damage any of the components.
Once you have removed the water tank, pour out any remaining water. Sometimes the water remains inside, so be sure to empty it.
2. Disassemble The Humidifier:
After you have emptied the water tank, it is time to start disassembling the humidifier.
It is important to be careful while doing this and to take note of how each piece fits together. This will make it easier to put the humidifier back together later on.
Moreover, some humidifiers have different filters, so you need to know which is better.
Start by removing the filter if your humidifier has one. Then, remove the wick and any other removable parts.
3. Wash All The Parts With Warm, Soapy Water:
Once you have disassembled the humidifier, start cleaning all the parts.
Use warm water and cleaners that are available in the market for humidifiers. Also, you can use mild soap or vinegar to wash the parts.
Vinegar is a natural disinfectant that removes any built-up minerals for cleaning humidifiers.
When washing the parts of your humidifier, use a toothbrush to clean any tight spaces. This will help remove any dirt or grime built up in these areas.

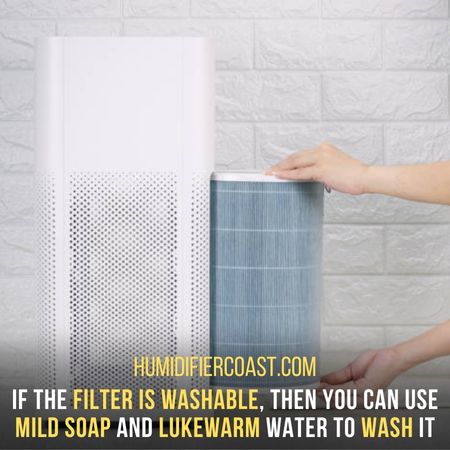
If the filter is washable, then you can use mild soap and lukewarm water to wash it. If the filter is not washable, you will need to replace it with a new one.
4. Rinse All The Parts Thoroughly:
After you have washed the parts, it is important to rinse them off. Wash with clean water so that no soap residue leaves behind.
To rinse the elements, you can use a spray bottle or run them under the tap. When doing so, make sure you shake off any excess water.
Water should be at room temperature or cooler. Otherwise, using hot water can damage some materials.
After washing all the parts, check for any cracks, holes, or other damage. If you find any damage, then you need to replace the part.
5. Wipe Down The Tank With A Clean Cloth:
Once all the parts have rinsed, you can start to wipe down the inside and outside of the humidifier’s water tank.
Use a clean, soft cloth for this step. If there are any tough stains, you can use a mild soap and water solution to help remove them.
Wipe off the water thoroughly to prevent rusting or corrosion. So it cannot damage the tubes inside the humidifier. Dry every part before moving on to the next step.
6. Reassemble The Humidifier:
Now it’s time to start putting your humidifier back together. Begin by attaching the base of the unit to the water tank. Make sure it is firmly in place and will not lose.
Next, you will need to reconnect all the tubes and electrical components. Follow the instructions in the manual to make sure that everything has to fix correctly.
If you don’t have your manual, you can usually find a diagram of the humidifier online.

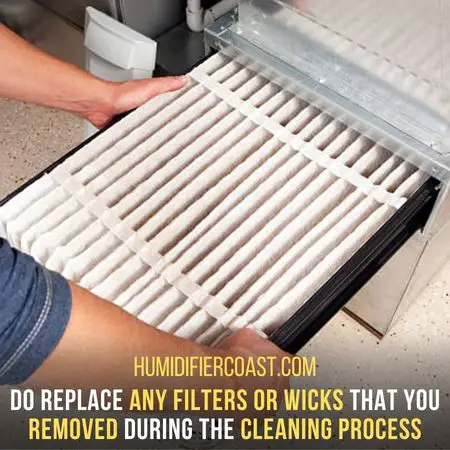
Finally, screw the top of the bypass humidifier back on. Do replace any filters or wicks that you removed during the cleaning process.
If you’re not confident to do this alone, there’s no shame in asking for a professional’s help. Professionals have the experience to reconnect the unit properly.
Getting your bypass humidifier back in working order is important, and it’s better to be safe than sorry!
7. Plug In The Humidifier And Fill The Water Tank:
This is the easy part! Plug in your bypass humidifier and add fresh, clean water to the tank.
And then, you’re now ready to use your humidifier again. Eensure you’re using clean water in your bypass humidifier, as dirty water can make the air in your home dirtier.
If you live in an area with hard water, it’s important to use distilled water or a water filter for humidifiers.
Hard water can leave mineral deposits on the parts of your humidifier. Later, it can lead to the growth of bacteria. As a result, your bypass humidifier won’t work as efficiently.
So, always pay attention to the quality of the water you use in your humidifier. It can make a big difference in the air quality of your home.

We hope you found these tips helpful for cleaning a bypass humidifier.
Conclusion:
If you want to keep your home’s air clear, it’s important to clean your bypass humidifier on a regular basis.
You can keep your humidifier in top working condition following some easy steps.
However, if you live in an area with hard water, you may need to take extra steps. They will help you with the humidifier and prevent mineral deposits from building up.
Frequently Asked Questions
A bypass humidifier is essential to many people’s homes, especially during the winter. These devices help to add moisture to the air.
They can prevent static electricity, help dry skin and throat and make the air feel more comfortable.
However, it is important to clean them on a regular basis to prevent the build-up of mold and mildew.
Regular cleaning ensures that your bypass humidifier is functioning properly. Further, it provides you clean and humid air you need.
Q1. How Often Should I Clean My Unit?
The frequency of cleaning as a bypass humidifier depends on how much you use it and the water quality in your area.
Generally, it is recommended that you need to clean your bypass unit every six months to a year.
But, if you live in an area with hard water, you may need to clean more frequently to avoid deposits from building up.
Besides all, you should also clean your unit any time you notice anything unusual. Also, when water tanks seem to get dirty or the humidifier isn’t working as well as it should.
Q2. Do I Need To Use Cold Water Or Hard Water In My Bypass Humidifier?
You can use either cold or hard water in your bypass humidifier but ensure you use clean water. However, warm water is better as it helps in the evaporation process of water.
Additionally, it’s better to use distilled water to prolong the life of a unit and avoid building up.
Q3. Do You Need A Professional Help To Clean The Unit?
The shortest answer is no; you don’t need a professional to help you clean your bypass humidifier.
Bypass humidifiers are essential for many homes, helping to improve indoor air. Yet, like all appliances, they need regular maintenance that you can do by yourself.
Still, if you have any concerns about how to clean a bypass humidifier properly, you can ask for help.
But honestly speaking, it is not that hard. You can clean it at home without external help with basic knowledge.
- How to Fix Cool Mist Humidifier Not Working After Cleaning? - October 1, 2023
- What Water to Use in Cool Mist Humidifier? And What to Avoid - October 1, 2023
- How Often to Use Cool Mist Humidifier? A Complete Guide - October 1, 2023
Leave a Reply